Fall is a season that offers endless inspiration for crafting, and pressed flower pumpkins are a delightful way to celebrate the beauty of this time of year. In this blog post, I'll guide you through the process of creating your own pressed flower pumpkins, and I'll also introduce you to a convenient flower press kit that not only enhances your crafting experience but can be an excellent Christmas gift idea for your loved ones.

Why Pressed Flower Pumpkins for Fall? Fall is synonymous with warm, earthy colors, and there's no better way to embrace this season than by incorporating its essence into your décor. Pressed flower pumpkins offer a unique blend of rustic charm and natural elegance that can enhance your home's autumnal ambiance.
Creating Your Pressed Flower Pumpkins
Materials You'll Need:
Pumpkins: Opt for real or artificial pumpkins in various sizes to suit your space.
Pressed Flowers: The key to crafting pressed flower pumpkins is, of course, the pressed flowers. Consider using a flower press kit to ensure your flowers are perfectly preserved and ready for crafting.
Glue: A strong adhesive suitable for use on pumpkins is essential.
Mod Podge (optional): For an added layer of protection and gloss.
Steps:

Press Your Flowers:
If you're using a flower press kit, follow the instructions for pressing your flowers. This process can take a few days, so plan accordingly.
If you are using your Ditsy Flowers Flower Press:
Gather your fresh flowers.
Trim stems or unwanted leaves off.
You will lay down your bottom press board, one drying plate, and one piece of lining paper.
You will arrange your flowers on top of the lining paper.
For smaller flowers, you can press them face up.
It is recommended for flowers with larger petals, to press them face down to help preserve their shape.
It is very important to space your flowers and greenery evenly. You do not want anything overlapping as this can cause your specimens to mold.
Once you have arranged your specimens on the first sheet of lining paper, you will cover them with a sponge.
You can repeat this process up to 5 more times. Be mindful that when you are pressing larger flowers and you are adding more layers, this will add time to your total pressing time.
Once you have added your final layer with a sponge, you will add your top press board. (It's the one with the beautiful engraved wildflowers).
Wrap the straps around the kit vertically and tighten the metal double rings.
Place the kit in the storage bag and press out any extra air.

Prepare Your Pumpkins:
If using real pumpkins, clean and dry them. If using artificial pumpkins, ensure they're clean and free from dust.
Design Your Layout:
Experiment with different flower arrangements. You can create intricate patterns or opt for a more natural, organic look.

Glue the Flowers:
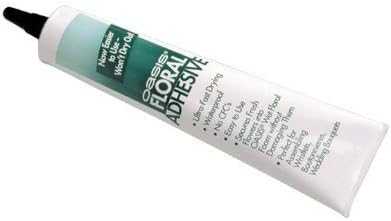
You can use a Floral Adhesive Glue to attach your your pressed flowers to the pumpkins. I have also just used Mod Podge to adhere and to coat pressed flowers. Both have great results. Either way, you can apply a small amount to the bottom of the flower and some to the pumpkin area. Be creative and have fun with your designs.

Seal with Mod Podge (optional):
For extra protection and a glossy finish, apply a layer of Mod Podge over your pressed flowers once the adhesive is dry. I think this not only helps preserve your pumpkins, but it makes them look more put together in my opinion.
Best Practices for Pressing Flowers:

Use a Flower Press Kit: As mentioned earlier, a flower press kit can be a game-changer for this project. It ensures that your pressed flowers maintain their color and shape, making your pressed flower pumpkins truly stand out.

Select Seasonal Flowers: Choose flowers that are in season during the fall, such as marigolds, asters, or chrysanthemums, to capture the essence of the season. I have officially fallen into my moody shades of reds and oranges, you can't tell me otherwise.
Dry Flowers Thoroughly: Make sure your flowers are completely dry before using them in your project to prevent mold or discoloration. This will help ensure that your pressed flowers are preserved in the perfect autumnal hues.

The Perfect Gift: Flower Press Kit Looking ahead to the holiday season, why not consider gifting a flower press kit to your crafty friends and family? It's an ideal present for those who love to create beautiful, nature-inspired crafts and keepsakes. A flower press kit offers endless possibilities for crafting, and it's a gift that keeps on giving.
So, as you embark on your journey to create pressed flower pumpkins this fall, don't forget to plan ahead for Christmas gifting. These pumpkins are so stinking cute, I think I might add some tea lights and tapers to them and gift them for hostess gifts. Happy crafting and happy gifting!
*some links are affiliates. As an Amazon Associate, I earn from qualifying purchases.


Comentários